Neater Stuff – Professional Organizational Services
July 14, 2014
Working from home with a little man has posed all sorts of challenges (it’s a wonder I get anything done) but the biggest challenge to date, has been baby proofing. The new boss-man gets into EVERYTHING.
My studio is ripe with sharp, toxic, messy, dangerous, and costly things. Even before Elliot arrived, I had been feeling as though the walls were closing in on me. So overwhelming it seemed, I enlisted the help of Susan Brun, owner of Neater Stuff.
First off the list….PURGE! Susan, being a third party (and a reasonable one at that), had no personal attachment to my stuff. She pointed out that I didn’t need every single blue bird from my wedding or bins upon bins of supplies that rarely, if ever, got touched.
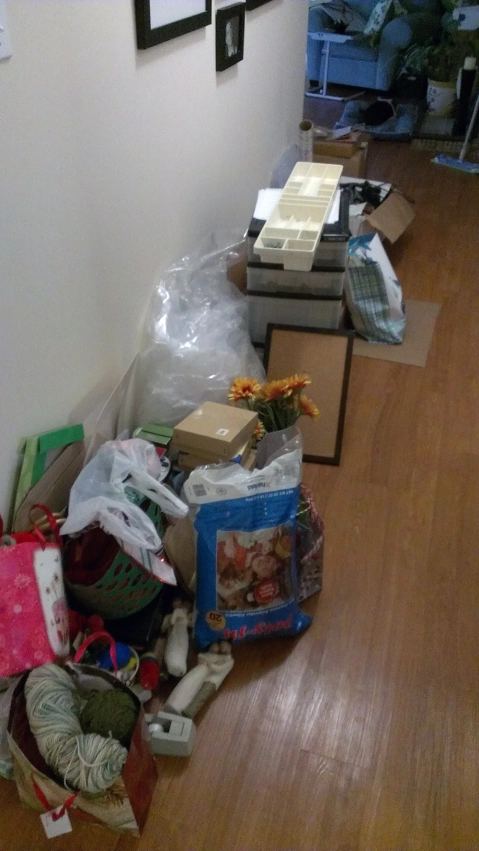
It was a truck full! Most of which was donated to local school art rooms or goodwill. To think I had all this unnecessary stuff packed into my closets…no wonder the walls were closing in!
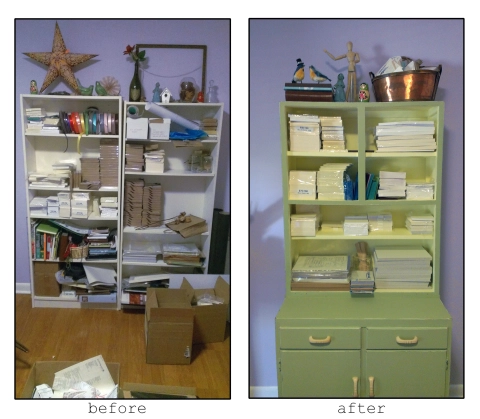
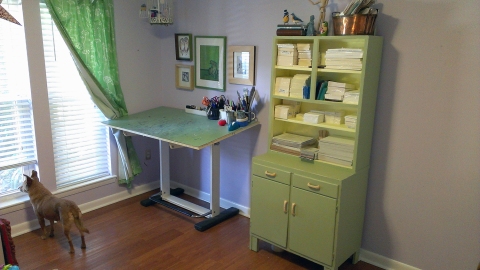
Now onto a bigger problem. I had been using two rickety old bookcases to house all of my inventory. I was terrified that my little explorer would pull them down on top of himself and there was no safe way to anchor them to the wall. (not to mention how unsightly they are….they aren’t even twins) I like to be able to see my stock of paper goods, so Susan suggested a china cabinet or furniture piece with cabinets on the bottom to keep the toxic paints locked up and open storage up top. We both spent a week hunting garage sales, antique stores and the like, and both of us kept coming back to this 1950’s piece from Two Women & a Warehouse. It was already painted, solid and a steal at only $220. Checkout that bakelite hardware!
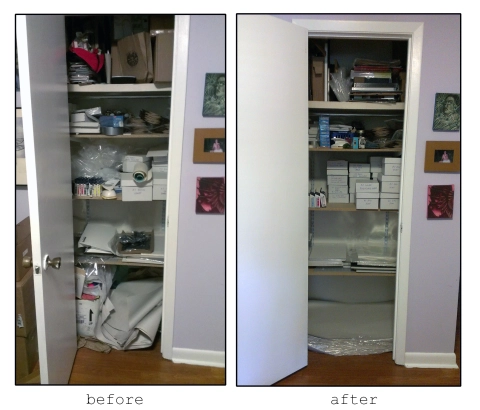
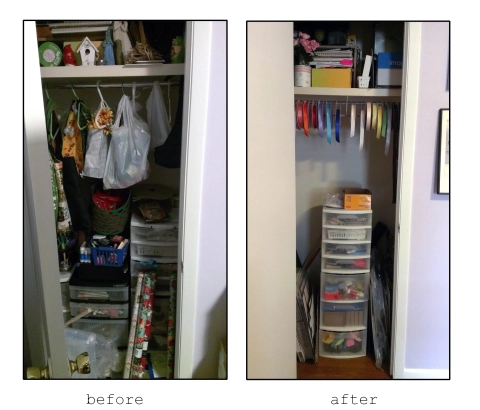
The closets followed suit…
My packaging newsprint is now easy to reach and doesn’t require me pulling half of it out onto the floor for a few sheets.
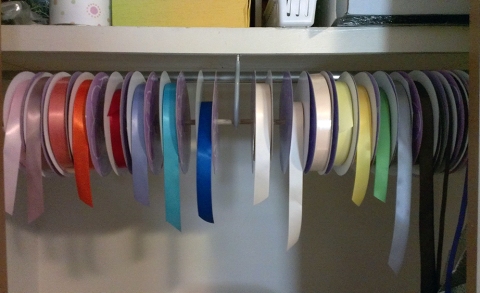
Why I ever thought using hangers to organize was a good idea, is beyond me! I managed to purge 2 whole bins of useless supplies, which allowed for me to move my packaging supplies off the floor and into the closet. My wrapping paper is now neatly contained in a corner bin, and Nick built me this super awesome ribbon holder…
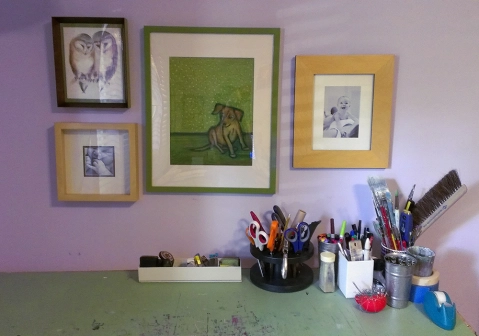
Susan is really great at re-purposing old items and working within a tight budget. During the great purge, I was tempted to completely discard an old scissor caddy. It was home to about 12 different fancy scissors, that maybe got used twice a year to make gift tags. Instead of throwing it out, we packed the fancy scissors away and moved the round caddy to my drafting table. It’s the perfect way to store the scissors and tools I use regularly. (I’m a total scissor snob, can you tell?)
The overall transformation is HUGE! I can see the floors, Vayda and Elliot can look out the window, I can allow Elliot to play at my feet in the studio without fear that he’s going to guzzle a pint of toxic paint when I’m not looking.
If you’re local to our area, I highly recommend Neater Stuff. I don’t think there’s an area, be it kitchen pantry, garage, commercial or residential that they couldn’t get organized. They can work with any budget and help you maximize your space. I finally feel like I can breathe over here. My space is functional, aesthetically pleasing, and most importantly, BABY PROOF!
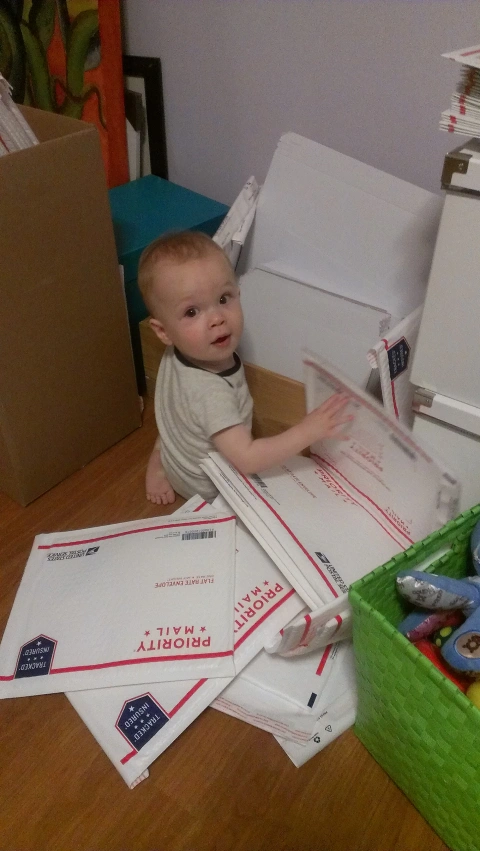
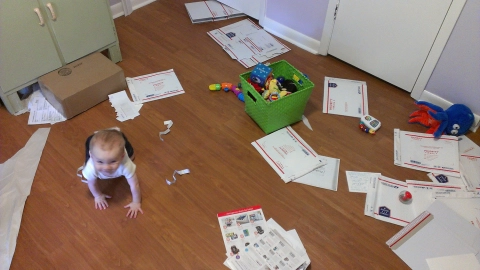
Though he still likes to rummage through the mailers and recycling bin!
Find Neater Stuff on Facebook!
Meet the New Boss
September 4, 2013
Elliot James took over FLYoung Studio on August 4th, 2013. Weighing in at just 7lbs 14 ounces, and “standing” a mere 20.5 inches tall, he has effectively taken charge of day-to-day production. Things have slowed a bit during this transitional time (on behalf of the new boss-man, we apologize) Frankly, he makes a habit of sleeping on the job and taking multiple lunch breaks throughout the day, while making us work the graveyard shift.
All that aside, we think he’s pretty cute and inspiring, so we’ll let him keep his post for now. Oh and in case you missed it, he was awake long enough to commission a photo session with Diana Daley.
One thing I love about Savannah are all the little hidden courtyards and carriage houses. As if the houses on the street aren’t charming enough?!
11×14 inches
Mural Painting 101 – Under the Sea Themed Nursery
June 7, 2013
People always assume my house is covered with murals. The fact is, I’m usually painting a wall for someone else and I’m quite indecisive when it comes to my own decor. That said, I have dreamed of the day I would get to design and paint my own nursery, and the time has finally come! I thought I’d document some of the process in case in of you DIY folk out there would like to try your hand. And yes, I’m fully aware that you can buy a vinyl decal these days, slap it on the wall and voila…but where’s the fun in that? This technique will show you how to take a simple sketch, blow it up, and transfer it to the wall. All you’ll need is a pencil, some paper, painters tape, acrylic paint, good brushes, and a steady hand.
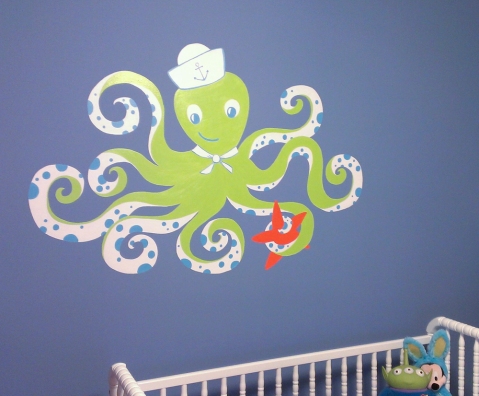
Since our nursery was already blue, I decided long before we found out we were having a boy that rather than repaint the whole room, we’d go with an Under the Sea theme. (some of you may recall a similar project I worked on a few years back…click!) Our nursery is small, so I wanted a focal point over the crib, and decided an Octopus would be fun to paint…
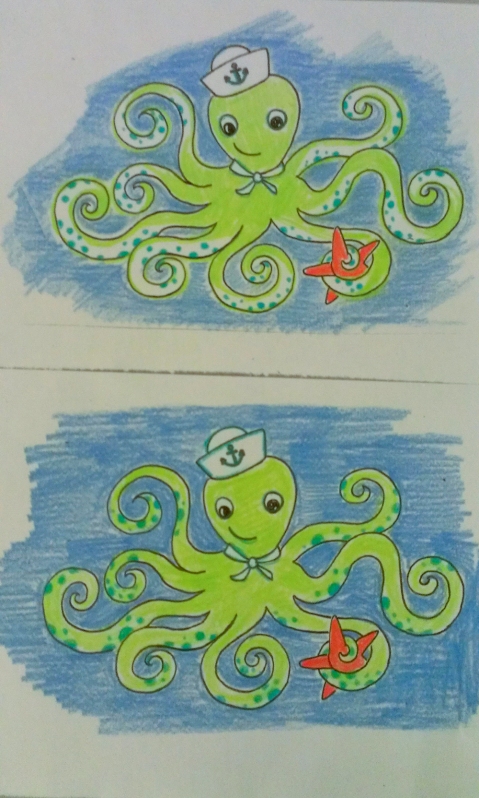
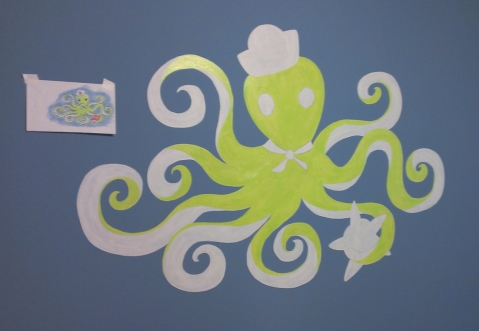
I sketched a few options with my favorite color scheme (blue and yellow-green with accents of red-orange) and chose the version with the white undersides to balance out the white in his sailor cap.
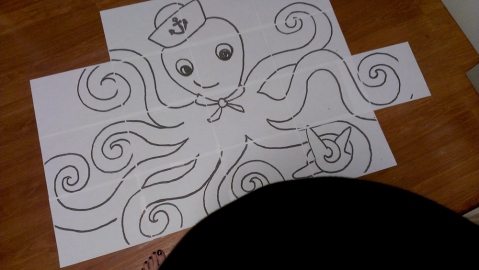
Next I scanned my tiny sketch into photoshop and printed him out to scale on regular letter sized paper. In the past, I’ve been known to free-hand a mural or two, but in the interest of keeping my proportions and minimizing the amount of touch ups needed, an enlarged template is never a bad idea.
Yep, that’s my big ole belly making a cameo.
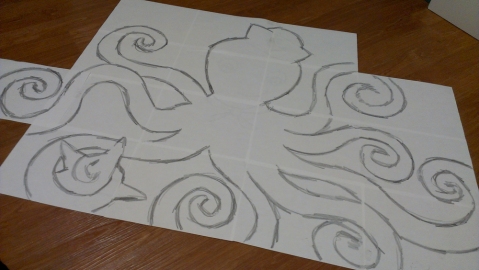
After putting all the pieces back together with tape, I flipped over the template and used the side of my pencil to roughly apply graphite to the black lines visible through the paper…
It doesn’t have to be perfect, in fact it’s best if you go a little outside the lines here. The more graphite applied, the better it will transfer to your wall.
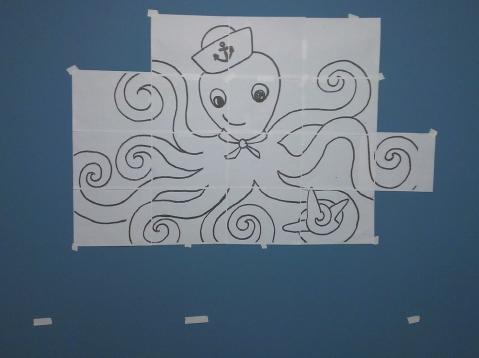
Next, tape your template to the wall using painters tape. You can move it around until you get it just where you want it…
I measured our crib and marked the height with those little pieces of painters tape to make sure that Ocho (yes, that’s his name) would be properly placed without being cut off.
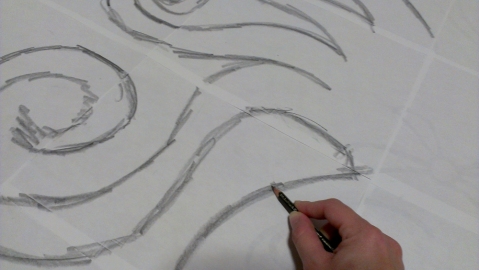
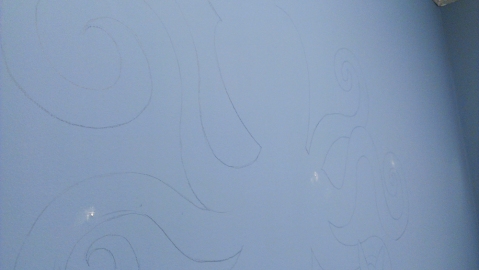
Next, I took my pencil and traced over the black lines, applying medium pressure. This will transfer that messy graphite to your wall. Before you remove your template completely, be sure to sneak a peek and make sure that all of your lines transferred nicely.
The lines will be faint, but they are there! Those little white spots are patched holes where we had nails from other artwork prior to making this the mural wall. To save myself from touching up blue paint, I strategically placed Ocho’s arms in the areas where the holes were.
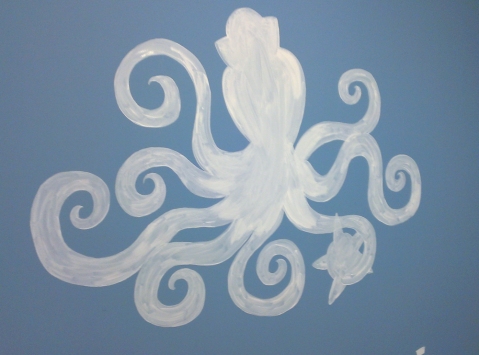
Now it’s time to prime…and prime some more….and some more after that…and some more after that. Trust me, you don’t want to skip this step if you’re planning on painting a colored wall. It will save you LOTS of time in the long run. I used Killz low VOC primer that we had on hand from another project. (with windows open for good ventilation of course)
Now that you’ve laid quite the foundation, it’s time to start painting the fun stuff. I always paint from the background to the foreground.
I kept my sketch of Ocho nearby for reference. Oh and I won’t lie…yellow-green, though one of my favorite colors, usually requires many, many coats for a nice opaque layer…this green took 4 coats to cover well…I’d probably still be applying coats if I hadn’t primed!
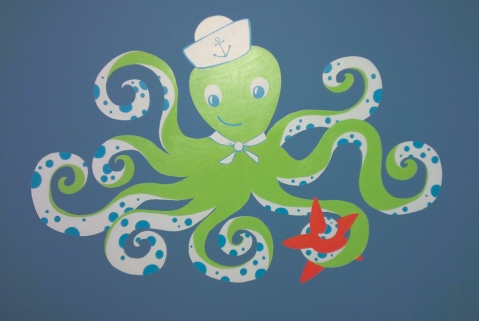
Here he is! Spots and all! I’m really happy with how he turned out! He’s bright (no pastels for my baby) and he’s the perfect size for over the crib…measuring roughly 3 feet tall by 4.5 feet wide. I won’t lie, he was definitely time consuming…roughly 20 hrs, start to finish, but totally worth it!
The best part? He’s completely custom for our lil man.
I’m sure I’ll be adding some additional features to his room as time goes on, but for now, this is about all I have in me…(and standing on a ladder probably isn’t too terribly safe for a pregnant woman anyway)
I’d love to see some pics of your own DIY murals, and hope this little tutorial gives you a few tips to help you create something really spectacular!
Be Merry!
December 23, 2012
The Factory Life
October 11, 2011
Featured on Emmaline Bride!
June 24, 2011
Thanks so much for the blog love! If you’re planning a DIY wedding, you will ADORE Emmaline Bride, so happy to be a part of the site!
Community
March 8, 2010
During my four years at SCAD, I had the opportunity to work first hand with some of the most talented, passionate, and fearless artists on the planet. It was such a blessing to have that community of artists to bounce ideas off of. Upon graduation, we dispersed and crawled into our own creative holes. This was before the time that everyone had a blog or twitter or facebook fan page, and for many of us, it was a tough transition. Which brings me to today’s post.
There’s a new community out there, a constant source of creative thought and inspiration, that’s carrying us all through a tough economic time. I’ve “met” some fabulous artists via a blog comment or a tweet, and there is nothing better than waking up on a Monday morning to have your work featured on another artist’s blog…(thank you Elizaveta and Pet Boutique, you made my day this morning) And even though the world-wide web can be a little saturated, it doesn’t take away that sense of community and fellowship that can be had with people of similar interest and perspective. We are so lucky to be living in this time!
Hope you all have a lovely Monday and thanks to all of you who have found my little corner of the web, and supported it! You mean the world to me!
*New* Savannah Hand Watercolored Prints & Mini Prints are Finally Here!
February 26, 2010
My original Savannah sketches have been given a little *punch* of color! (Sorry for the delay, but things had to be “just so” you know) Each 8×10 print has been delicately hand watercolored by yours truly, making each one unique. Of course, if you haven’t the space for an 8×10 and you must have a little something “Savannah,” then the Mini-Prints are for you! They come matted ready to fit a 5×7 inch frame…(perfect for the tabletop frame) or a collection of little Savannah memories…take your pick! You can find these little gems locally at ShopSCAD or purchase them online via TheInkLab. Enjoy!
P.S…if you wish to subscribe to this bloggity blog, there’s a new email subscription thingy in the right hand column. How about that! FLYoung Studio right in your inbox! have a lovely weekend peeps!
All Artwork © 2010 Heather L. Young
have you seen…
March 19, 2009
the new FLYoung Studio North? My more graphic (and masculine) counterpart has me dreaming of a site overhaul for the fine art side of things…but alas, one step at a time. Just look at Nick’s fine display of my portfolio? So crisp, and well thought out.

We have big plans for things, exciting ideas on the horizon, and new projects in the works…so be sure to check out the new FLYoung Studio North. Oh and pretty-pretty-presto-please! Spread the word that we’ll be offering the most cost effective web design around to help the small business owner…don’t let the struggling economy prevent you from getting the website you deserve!
